Modelisme
Index
- General
- Maquetes
- Trens
- Info
- Federacions i associacions
- Fires
- Blocs / Blogs
- Circuits / Layouts
- Escales / Scales
- Èpoques / Epochs
- Normes
- NMRA
- NEM
- Senyalització / Signalling
- Publicacions / Publications
- Catàlegs / Catalogs
- Marques / Brands
- Fleischmann
- Locomotores / Locomotives
- Cotxes / Cars
- Fleischmann
- Botigues / Shops
- Vies / Tracks
- Programari / Software
- Electrònica / Electronics
- Lèxic
- Cotxes
General
- El màgic món del tren (Santa Eugènia de Berga)
- Railhome BCN (Igualada)
- ExpotrenSHOP
- Agenda (llista amb llocs d'interès, agrupats per països i tipus, per exemple: maqueta visitable)
- Entitats
Maquetes
- Marques / Brands
- Faller (L W H)
- 2241 Église de village
- 2243 Alpine cabins
- 222116 Remise à locomotives
- 222117 Remise à marchandises
- 222173 Passage à niveau gardé
- Platforms
- Kibri / Vollmer / Viessmann
- Noch
- Faller (L W H)
- Programari / Software
- Exemples
- Il·luminació / Lighting
- Philips
Hue
- Carril
suport
preu
catàleg
ref
220V
GU10
E27
LedBox
Lamparas.tv
Castilla
e-lamparas
Coben
iLamparas
virtual lamp
ventidecor
Faro
carril 2m
64211
x
74,96
73,70
68,03
73,76
68,03
73,70
PLOT 64202
x
x
RAM
40100
x
x
32,02
33,60
33,03
30,49
30,49
34,13
RAIL TOR
x
14
enviament
0
0
0
0
175,76
176,09
176,10 176,09 (170,81)
- Philips
Hue
- Infrastructura
- Tipus / Types
- Base / Plateau
- esquelet
- contraplacat: 10mm (qum)
- Maleta / Valise
- Esquelet / Ossature-bois (cadre ouvert)
- Quadernes / Couples (autoporteur) / Cuadernas
- Quadriculat / Quadrillage
- Plegat / Rabattu
- Suspensió del sostre / Suspendu
-
nivell / level
tècnica
material dimensions
via
aïllant
suro / cork - 4/5mm (H0)
- 2/3mm (N,Z)
EVA 1mm (Z) pista
contraplacat - 10mm (H0)
- 6/8mm (N)
- 4mm (Z)
suport de pista
quadernes contraplacat
pilar llistó
rampa helicoidal
llistó 30x10 espàrrec
base
placa horitzontal contraplacat 10mm
enreixat (cada 300mm)
llistó
estructura
perímetre de blocs de menys de 200x100
llistó
100x20
120x30potes
llistó 40x40
entre potes
llistó 40x10
- Base / Plateau
- Llibres / Books
- Le réseau miniature: 5. Infrasctructure (LR Presse)
- Basic model railroad benchwork
- Comercial / Commercial
- Tipus / Types
- Materials
- Materials world (Servei Estació)
- Leroy Merlin
- Llistons
(2400mm)
mm
18
21
27
34
44
58
18
14122892
21
14125601
27
14125615 14125664
34
14122920 14125622
14126063
44
14123221 14123256 14125923 14126070 14126196
56
14123235 14123263
14126084 14126210
58
14131243 67
14123270
14126252
68
14126105
69
14123242
14125951
70
14131411 93
14125965
14126273
96
15774073
14126273
117
15774101 14125643 14126000
140
14126021 14126126
190
15774115
14126056 14126140
ref
llargada
preu
14126210
2400
56
44
9,70
14126140
190
34
21,95
14126056
190
27
14,95
15774115
190
18
10,65
14126126
140
34
15,95
14126021
140
27
11,50
14126000
117
27
9,95
14125643
117
21
7,75
15774101
117
18
8,95
15774073
96
18
6,50
14126273
93
44
13,50
14125965
93
27
8,55
14131411
70
58
13,95
14125951
69
27
7,90
14123242
69
18
4,70
14126105
68
34
9,35
14126252
67
44
11,25
14123270
67
21
5,25
14131243
58
58
11,50
14126210
56
44
9,70
14126084
56
34
7,95
14123263
56
21
4,90
14123235
56
18
3,75
14126196
44
44
7,45
14126070
44
34
5,95
14125923
44
27
5,50
14123256
44
21
4,40
14123221
44
18
3,40
14126063
34
34
4,75
14125671
34
27
3,95
14125622
34
21
3,50
14122920
34
18
2,70
14125664
27
27
3,30
14125615
27
21
2,80
14125601
21
21
2,40
14122892
18
18
1,95
- Contraplacat
5mm
- 122x244
- 60x120
- 40x120
- 40x80
- 30x60
- Llistons
(2400mm)
Trens
- Info
- Federacions i associacions
- Fires
- Blocs / Blogs
- Maquetas Auqué
- Quiero
una maqueta
- Longitud de los trenes (MLT)
- locomotora + 5 cotxes: 15 + 5*16 = 91 cm
- radi mínim: > 2*longitud cotxe
- Longitud de los trenes (MLT)
- La maqueta de
Esteban
- Tomas de corriente
- Paso a nivel (mecanisme VHS)
- Mi maqueta de tren a escala N
- Mi maqueta Märklin Z
- ¿Cómo funcionan los trenes?
- Cornimont-Train miniature
- Modélisme
ferroviaire & électronique
- piliers en bois
- N-scale blog
- RCFEB
- Trenscat
- Mon petit monde en miniature
- Ho Ptit Train
- Mon 1er reseau N (deric)
- Kilómetro 160 (N)
- Circuits
/ Layouts
- John Allen's Gorre and Daphetid Railroad - A Reminiscence (archive)
- The classic switching puzzle John Allen's Timesaver
- Why Waste the Space on an HO 4X8?
- Model train layout
- Rob's Railway Pages
- The Layout (made with XTrkCad)
- LK&O
- Diamond Springs & Western
- Layout
- Trackplans
- Llibres / Books
- Escales / Scales
- Èpoques / Eras (NEM 809E, 810F) (*)
època
NEM 809E NEM 810F
vapor
elèctrica
dièsel
TGV
I
1844-1910 1870-1920
x
II
1911-1940 1920-1945
x
III
1941-1970 1945-1970
x
x
IV
1971-1990 1968-1985
x
x
V
1991-2005 1985-2000
x
x
x
VI
2006- 2000-
- Normes / Norms
- European DCC (NEM) compared to US DCC (NMRA)
-
Nom
Lloc
Grup
Norma
Descripció
BRMSB
UK
NMRA
(National Model Railroad Association)
EUA
DCC
S-9.1
DCC Electrical Standard
- "1" bit: 58μs * 2
- "0" bit: 100μs * 2
S-9.2
DCC Communications Standard
Communications Standards For Digital Command Control, All Scales (2004)
S-9.2.1 DCC Extended Packet Formats (2025: aligned with RCN-213) (2021) (2012) (operations)
- 2.1: Address Partitions
- 2.2: Broadcast Command for Multi Function Digital Decoders
- 2.3: Instruction Packets for Multi Function Digital Decoders
- 2.4: Accessory Digital Decoder Packet Formats
- 2.5: Operations Mode Acknowledgment (refer to S-9.3.1 and S-9.3.2)
- Appendix A
S-9.2.2 DCC Configuration Variables (2012) (CV)
- Descriptions of Configuration Variables for
Accessory Decoders
- CVs513-1024 have been moved to CVs1-512
- Appendix A: DCC Manufacturer ID codes (2021)
S-9.2.3 DCC Service Mode (2012) (service)
- D: Decoder Acknowledgment Mechanism (DCC ACK)
S-9.3
DCC Bi-Directional Communications Standard S-9.3.1 (discontinued)
S-9.3.2 Communications Standard for Digital Command Control Basic Decoder Transmission (2012) (RailCom)
NEM (ca, ca, fr)
(Normes Européennes de Modélisme)
(by MOROP)
Europa
Instal·lacions fixes (fabricants)
Instal·lacions fixes (modelistes)
NEM 102
Gabarit de libre passage en alignement
Gàlib de lliure circulació en línia recta
NEM 103
Gabarit de libre passage en courbe
NEM 104
Gabarit de libre passage pour voies étroites
NEM 105
Profils de tunnels poir voie normale
Boques de túnels per via normal
NEM 110
Vies i agulles. Cotes de guiat NEM 110G
NEM 111
Rayons de courbure minimaux
Radis de corba mínims
NEM 112
Entraxes des voies
Entrevies
NEM 113
Racordement des courbes
NEM 114
Dévers en courbe
NEM 122
Secció transversal de la via. Vies normals NEM 123
Secció transversal de la via. Vies estretes NEM 124
Agulles i encreuaments amb cors fixos NEM 127
Dobles cors fixos dels encreuaments rectes NEM 201
Hauteur des lignes aériennes
Alçada de la línia aèria
NEM 900
Les réseaux modulaires, généralités
NEM 943F
Réseau modulaire échelle H0 FFMF
Material rodant
NEM 301
Gabarit du matériel roulant
NEM 355
NEM 809E
Èpoques del ferrocarril a Espanya NEM 810F
Les époques du chemin de fer en France
Electricitat i electrònica NEM 651
Interficie elèctrica. 6 pols Electricitat i electrònica
NEM 671
Sistema de control digital DCC: Paquets de dades bàsics (ca) (pdf)
Signal de commande numérique DCC: Paquets de données de base (fr) (pdf)
References to: RCN-210, RCN-211, RCN-212, RCN-213, RCN-214
RailCommunity DE
Normen RCN-210
DCC Protocol Bit Transmission /
Transmission du bit
RCN-211
DCC Packet Structure /
Structure dun paquet, et structure de base de tous les paquets et champs
dadresses
RCN-212
DCC Operating Commands for vehicle decoders /
Commande de lexploitation des décodeurs dans les véhicules, et commandes
des décodeurs des véhicules
RCN-213
DCC Operating commands for accessory decoders /
Commandes pour lexploitation des décodeurs daccessoire
RCN-214
DCC configuration commands /
Commandes de configuration
- Senyalització / Signalling
- Maquinari / Hardware
- Programari / Software
- Rocrail: signals
- JMRI signals
- Senyalització
real
- Senyalització ferroviària (wp)
- Cantó ferroviari
- Signalisation ferroviaire en Europe (wp)
- França
- Espanya
- Modelisme
- Arduino
- POWS
- UniSemaf Paco Cañada (pdf)
- UniSemaf648 Paco Cañada (pdf)
- Normativa de senyalització real
- BOE
- Real Decreto 695/2018 (29 junio 2018) (BOE-A-2018-9029)
- Real Decreto 1011/2017 (1 diciembre 2017) (BOE-A-2018-285)
- Real Decreto 664/2015 (17 julio 2015) (BOE-A-2015-8042)
- Adif
- AESF: Agencia Estatal de Seguridad Ferroviaria
- Anexo:Señales de ferrocarril en España (wp)
- ¿Cómo funcionan los trenes?
- Semaforos
Mafen o Aneste (Forotrenes)
- quins, quants
-
NOTA: les imatges svg de dins de la taula han estat generades ambIndicació
Acció
Exemple
Senyal
BOE-A-2015-8042-C.pdf
BOE-A-2015-8042.pdf
Senyals
fixos
fronamentals
alt GRYW
alt GRYB alt GR-W
alt GRY
alt GR-
alt -RY
alt G-Y
baix GR
baix RW
baix RR
baix R(G/Y)
 mast_SL_4A_high
 mast_SL_4B_high
 mast_SL_3C_high
 mast_SL_3D_high
 mast_SL_2E_high
 mast_SL_2F_high
 mast_SL_2G_high
 mast_SL_2H_low
 mast_SL_2I_low
 mast_SL_2J_low
mast_SL_2K_low
E/S d'estacions
plena via (divisió cantons)
E/S estacions sense BA
senyal avançat en línies
sense BA
abans agulles S,
sense BA
abans agulles E/S
secundàries
Via lliure
Vía libre
VL
FF1A
Circular normalment desviament recte  VL
VL VL
VL VL
VL VL
VL VL
VL
 VL
VL VL
VL
Via lliure condicional Vía libre condicional VL' FF2
No excedir 160Km/h
 VL'
VL' VL'
VL' VL'
VL' VL'
VL' VL'
VL'
 VL'
VL' VL'
VL'
Anunci de precaució Anuncio de precaución PR
FF3
No excedir 30Km/h desviament corba  PR
PR PR
PR
 PR
PR
 PR
PR
Preanunci de parada Preanuncio de parada
FF4
120
No excedir la velocitat indicada, en passar pel senyal següent
Anunci de parada Anuncio de parada AP
FF5
Parada davant del proper senyal
senyal vermell proper  AP
AP AP
AP
 AP
AP
 AP
AP AP
AP
Anunci de parada immediata Anuncio de parada inmediata AP' FF6
Posar-se en condicions de parar davant del següent senyal o final de via a curta distància
 AP'
AP' AP'
AP'
 AP'
AP'
 AP'
AP' AP'
AP'
Parada Parada P FF7A, B
Parar davant del senyal
següent cantó ocupat  P
P P
P P
P P
P P
P P
P-  P
P P
P PA
PAPA Parada selectiva
Parada selectiva
FF7C
 RA
RA
FF7D
 RA'
RA'
Depassament autoritzat
Rebase autorizado
RA
FF8B, C
Parar i seguir en marxa de maniobres
 RA
RA
RA -
-
 RA
RA
Depassament autoritzat Rebase autorizado RA'
FF8A
Marxa de maniobres
 RA'
RA'
RA' -
-
 RA'
RA'
Moviment autoritzat Movimiento autorizado MA FF9
Circular en marxa de maniobres fins al següent senyal
 MA
MAMA MA -
-
 MA
MA
Indicador d'entrada
IE1
FI1A
IE2
FI1B
python signals.py
                                  json/adif.json
, del projecte jmri-signals.
- BOE
- Modelisme
- ...
- Publicacions / Publications
- LR Modélisme
- "Le
réseau miniature" (11,50/u)
- 01. Conception ✔
- 02. Electrification ✔
- 03. Plans et projets ✔
- 04. Relief et paysage ✔
- 05. Infrastructure ✔
- 06. Electronique ✔
- 07. Rues et bâtiments (épuisé)
- 08. Voies, aiguilles et caténaire ✔
- 09. La signalisation en quelques cas types (épuisé)
- 10. Trains de jardin ✔
- "Les
guides pratiques du train miniature"
- 01. Bien débuter avec l'échelle N ✔
- 02. Signalisation du réseau miniature (96p)(19,50) ✔
- 03. Comment tracer votre réseau ✔
- 04. Les commandes numériques pour tous ✔
- 05. L'électricité du résau ✔
- 06. Voies réelles et vois modèles ✔
- 07. 50 Plans et projets (sep 2022) ✔
- 08. Animez votre réseau - Initiation au sysème Arduino (fév 2023) ✔
- Le
B.A.-BA du train miniature (fascicules, 28p/vol)
- Écrin B.A.-BA
- 01-08
- 09-16
- 09. La commande numérique des trains ✔
- 10. Les gares et bâtiments ferroviaires ✔
- 11. Les locomotives et trains de voyageurs ✔
- 12. Les locos et trains de marchandises et d'exploitation ✔
- 13. Les reliefs et paysages ✔
- 14. Les ponts et tunnels ✔
- 15. Les champs, bois et chemins ✔
- 16. Les rues et places ✔
- 17-24
- 17. Les bâtiments civils et urbains ✔
- 18. Les bâtiments civils ruraux (2022) ✔
- 19. Les fonds de décor (2022) ✔
- 20. Les effets visuels, sonores et lumineux ✔
- 21. Les scènes de vie (2023) ✔
- 22. Les détails ferroviaires (2023) ✔
- 23.
Les détails urbains et campagnards (2023)
Les
détails urbains ✔
- 24. Voies étroites et secondaires (2023) Les détails campagnards et routiers ✔
- Loco-Revue Hors série
- 32. (07/2013) 25 plans de réseaux pour la maison ✔
- 37. (05/2014) Commande numérique du réseau ✔
- 42. (03/2015) Découvrez le MFAO ✔
- 43. (05/2015) Commande numérique du réseau ✔
- 46. (11/2015) Le meilleur du train miniature - tendance 2015 ✔
- 47. (01/2016) Faites manuvrer vos wagons ✔
- 48. (03/2016) 20 étapes pour un réseau ludique et réaliste... ✔
- 55. (06/2017) MFAO 2 le modélisme assisté par ordinateur ✔
- 60. (04/2018) Les passages à niveau en modélisme ✔
- 65. (02/2019) Construisez presque tout avec presque rien ✔
- 66. (04/2019) 24 plans de réseaux pour bien débuter et progresser ✔
- 67. (05/2019) 40 techniques simples pour votre train miniature ✔
- Clés pour le train miniature
- "Le
réseau miniature" (11,50/u)
- Livre : Collection Le réseau miniature
- Maquetrén
- The Scenery Manual
- LR Modélisme
- Fòrums
- Cyberspace World Railroad
- CTMS (Control tren modelo por software)
- Escala N
- Modelismo-n
- Foro trenes
- N Gauge Forum
- Plataforma-n
- Tren Miniatura (ibertren.info)
- Catàlegs / Catalogues
- Marques / Brands
- ...
tipus marca referència model longitud foto
locomotora
cotxe
Fleischmann
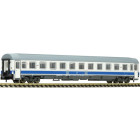
814477 Eurofima RENFE 1st class
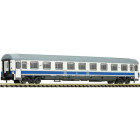
814478 Eurofima RENFE 2nd class
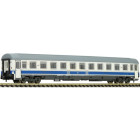
814479 Eurofima RENFE 2nd class
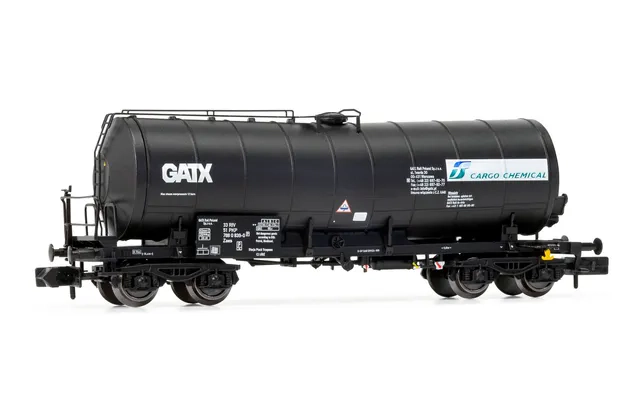
vagó Arnold HN6436 FS Cargo Chemical
Brawa
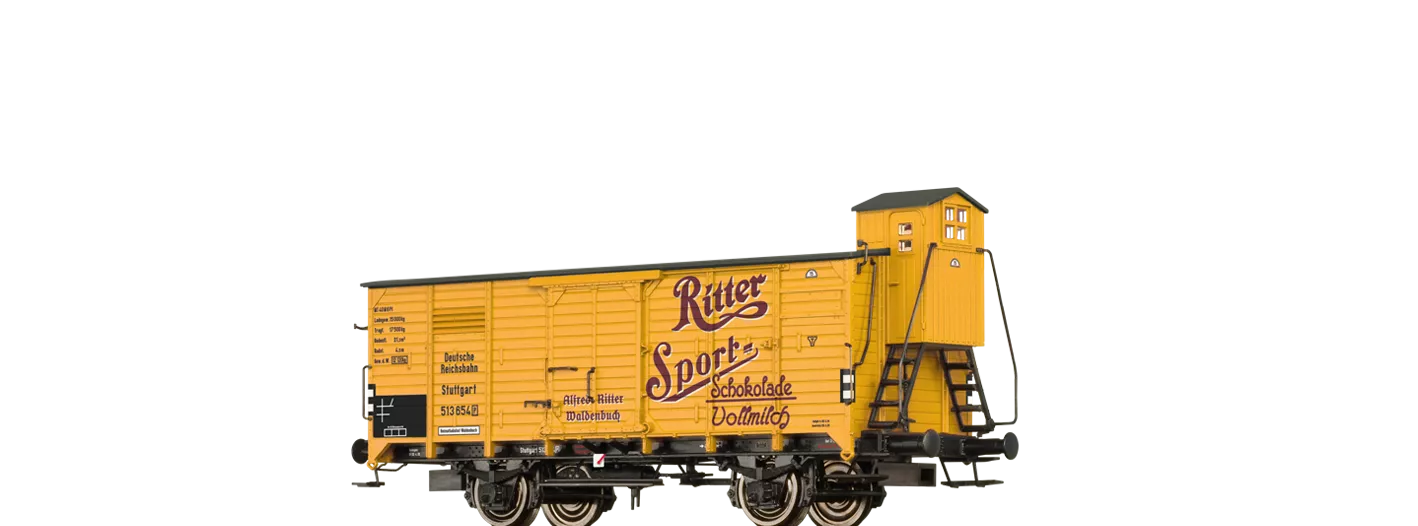
67485 Ritter Sport
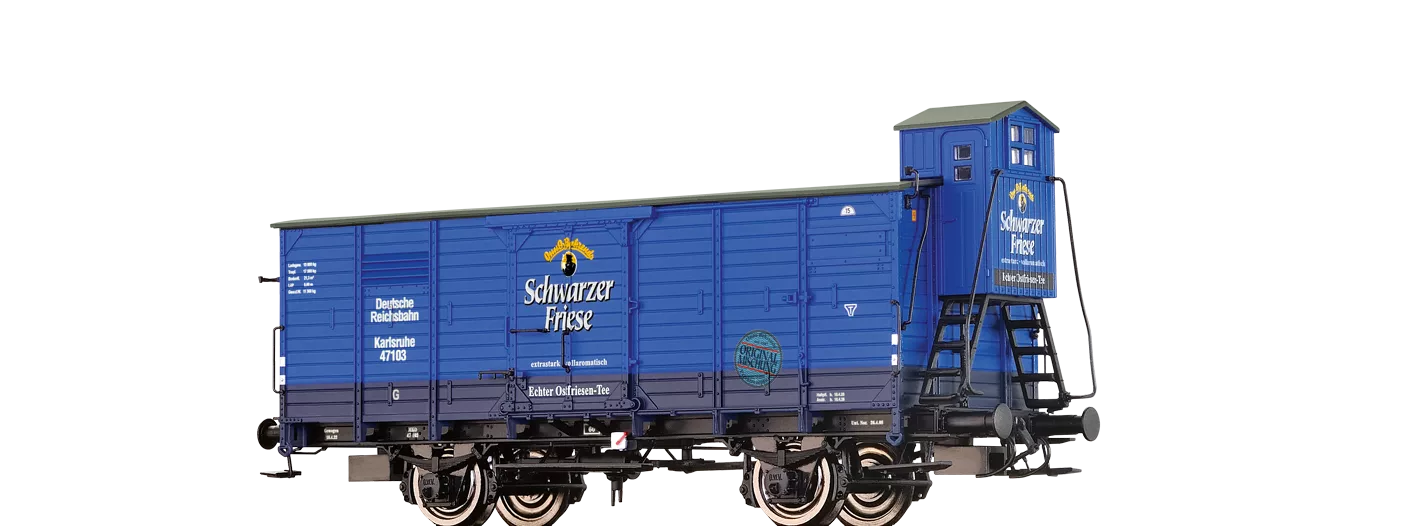
67463 Scharze Friese
Fleischmann
845374 Font Vella

848903 Holcim 170 
Kato 8037-4 Cisterna

Liliput L265984 BP

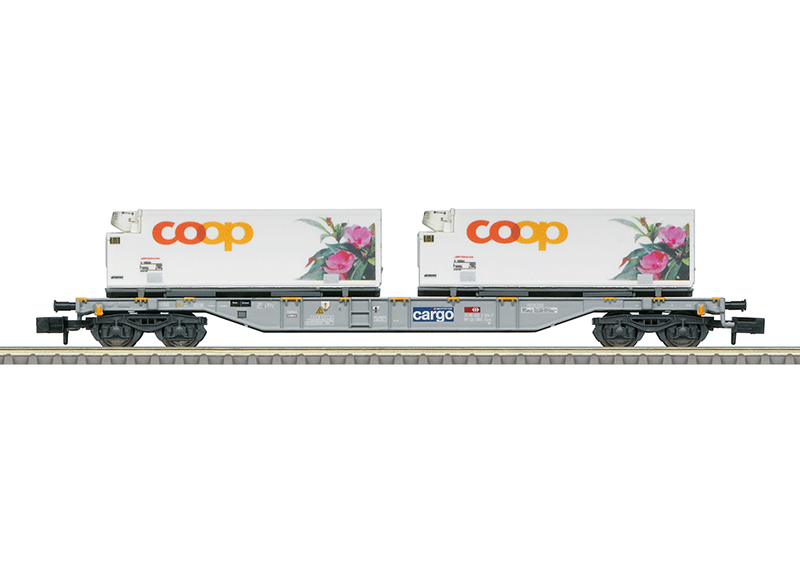
Minitrix 15494 Coop
Peco NR-P949 Mariano Moreno

NR-P967B Vagones Cuba de Tomelloso

- Aneste
- Aneste Datank
- Señalización
ferroviaria N (Semàfors
/ Light signals)
- 2841 (GRYW)
- groc: 2kΩ
- vermell: 8.2kΩ
- verd: 2kΩ
- blanc:
- comú: díode
- consum:
descodificador tensió G R Y W tots Arduino Nano Every alimentat per USB 4,79V 1,19mA 0,32mA 1,18mA
3,70mA
- 2841 (GRYW)
- Señalización
ferroviaria N (Semàfors
/ Light signals)
- Aneste Datank
- Digikeijs
- Vegeu: YaMoRC
- Fallida: abril 2023
- Digikeijs downloads, software and manuals (backup)
- Maquinari
- Fleischmann
(es)
- Catalogues
- Locomotores /
Locomotives (DCC CV)
- RN 204, NS Railion (721181) (diesel)
- Siemens BR 183 "Taurus" (VI) (731210) (89) (electric) (122,3mm)
- Re 460, SBB Le Lait Lovely, with sound, (731376) (electric) (116mm)
- Re 460 019-3 "175 years of Swiss railways" (CFF/SBB) (731369) (electric) (...mm)
-
dimensions reals dimensions escala N
model tipus longitud distància
pivots bogisamplada xtrkcad-custom-fpm longitud model N companyia edició ref RN 204 (V100) (V100 series) Diesel 1394,0 cm
700,0 cm
310,0 cm
proto-fpm.xtp 87 mm
NS Railion, DB
721181, 721101 Siemens BR 183 Taurus (Alex 183) Elèctrica 1958,0 cm 990,0 cm
300,0 cm proto-fpm.xtp 122,3 mm Alex
731210 Re 460 (SBB Re 460) Elèctrica 1850,0 cm
300,0 cm
proto-fpm.xtp 116 mm SBB/CFF Le Lait (sound) 731376
SBB/CFF 175 years of Swiss railways 731369
- Cotxes / Cars
-
tipus UIC dimensions reals dimensions escala N
model
longitud entre topalls distància
pivots bogisamplada xtrkcad-custom-fpm longitud companyia edició ref Eurofima UIC-Z 2640 cm 1900 cm 282,5 cm proto-fpm.xtp 165 mm Renfe
814477 ...
-
Palau
Rocafort
BLM
special
cotxe Renfe Eurofima (1a)
814477
-
29,90
29,90
27,06
cotxe Renfe Eurofima (2a) 814478
29,90
27,06 cotxe Renfe Eurofima (2a) 814479
29,90 27,06 cotxe Renfe Eurofima (1a)
814488
29,90
27,06 cotxe Renfe Eurofima (2a) 814489
29,90
27,06 cotxe Renfe Eurofima (2a) 814490
29,90
27,06 llum interior
946901/20021
23,40
-
- Vagons
- Lèxic
- models
- 845374 Font Vella
- 848903 Holcim
- Decoders
- Starter sets
- Ibertrén
- Lenz (USA)
- Mabar
- Mafen
/ N-Train
/ 87Train
- Semàfors
/ Light signals
- ànode/positiu comú / common anode/positive
- màx: 16V AC/DC
- 4131.15
- consum:
descodificador voltatge G R Y W tots notes Arduino Nano Every alimentat per USB 4,82 V 0,03 mA 0,06 mA 0,21 mA
0,32 mA es veu poc brillant Arduino Nano Every alimentat a 15V 4,79 V
0,32 mA es veu poc brillant Font d'alimentació directa
(Siglent SPD1305X)4 V
0,21 mA es veu poc brillant 5 V
0,33 mA
6 V
0,47 mA
7 V
0,59 mA
8 V
0,72 mA
9 V
0,85 mA
10 V
0,97 mA no té brillantor màxima 11 V
1,11 mA brillantor màxima 12 V
1,23 mA brillantor màxima 13 V
1,36 mA brillantor màxima 14 V 0,16 mA 0,25 mA 0,97 mA 0,11 mA 1,50 mA brillantor màxima 15 V 0,19 mA 0,28 mA 1,06 mA 0,12 mA 1,62 mA brillantor màxima 16 V 0,20 mA 0,29 mA 1,14 mA 0,13 mA 1,75 mA brillantor màxima
- consum:
- Semàfors
/ Light signals
- Märklin (com)
(es)
- Trix / Minitrix (es) (Trixtrains)
- Peco (UK)
- Roco (com)
- Starter sets
- Electrical
accessories
- Connectors
- YaMoRC
- Vegeu: Digikeijs
- ...
- Z21 (Fleischmann, Roco)
- Càmera
- ...
- Botigues / Shops
- DCC Versand (OpenDCC)
- Decoders.es
- Edima (Terrassa)
- El taller del modelista
- Modelismo del tren
- MSL Modellbahnshop-Lippe (de)
- Palau (Barcelona)
- Rocafort (Barcelona)
- Tren
Castilla
- Digikeijs
- Tren Eléctrico
- Trenes Aguiló
- Zaratren
- Catálogos 2015
- Semáforos
N
- ZT-FR2014 (N, 3 llums)
- Blog
- Catálogos
2015-2016
- Roco
- Fleischmann (pdf)
- Catálogos
2015-2016
- Vies / Tracks
- Inventari (Drive)
- Separadors
- Topic: Fleischmann Piccolo N gauge track
- Panoramica binari in scala N / Übersicht Spur-N Gleise
- Rail size
- Rail size (dcc wiki)
- Rectes
- Corbes
- Dudas sobre radios
- Radi mínim:
- 2 x longitud_cotxe (N: 165mm) = 330mm (Fleischmann 22225 R4 329mm)
- XtrackCAD: N -> 248mm (Fleischmann 22223 R3 261.8mm)
-
H
B
S
KB
KH
roadbed
height
mount width
steg
head width
head height
threshold len width
threshold len height
total height
Fleischmann Piccolo
9xxx
x
2,1
1,8
0,4
0,6
0,5
16,6
2,0
4,1
old Roco
22xxx
-
2,1
1,4
0,35
0,6
0,5
16,0
1,9
3,8
-
Roco /
Fleischmann 222xx (sense balast)
2015/2016 (pdf)
Technik-Info (pdf)
Track stencil (20050)
desviaments / turnouts
6° 10° 12° 15° 24° 30° 42°
XTrackCAD
N-fl.xtp
radi
mm
in
rectes
17.2 0.677165
5/8
- 22207 (22206+22207=22261)
33.6 1.322835
1-5/16
- 22206 (minimum distance between parallel tracks)
50 2
2
- 22205 (112.6+4*50=312.6)
54.2 2.133858
2-1/8
- 22204 (balance for turnout R1 24°; R5 15°)
104.2 4.102362
4-1/8
312.6 12.307087
12-5/16
- 22202 (312.6=3*104.2)
730
corbes 194.6 7.661417 7-5/8
R1
- 22221 30°
22232
22231
22221
228.2 8.984252 9
R2
22234
22233 22222
261.8
10.307087
R3
- 22223 30°
22223
295.4
11.629921
R3a
22235
22224
329 12.952756 12-16/16
R4
- 22225 15°
22225
362.6
14.275591 14-1/4
R5
22226
- turnout 112.6mm / R5 15°
- double
turnout 129.8mm (112.6+17.2) / R5 15°
- 22246 (e)
480
18.897638 18-7/8
R6
- 22227 15°
22227
765
30.118110 30
R7
22228
6° 10° 12° 15° 24° 30° 42° - ...
-
Dudas sobre radios
Fleischmann
Piccolo (91xx) (amb balast)
Roco /
Fleischmann 222xx (sense balast)Minitrix
Pico
Starter program (pdf: p25)
Turnout instructions (pdf)
Track stencil for N gauge (995101)
2015/2016 (pdf)
Technik-Info (pdf)
Track stencil (20050)
gif
XTrackCAD
flnpicco.xtp rocon.xtp
radi
mm
in
rectes
17.2
- 22207 (22206+22207=22261)
27.75
33.6
- 22206 (minimum distance between parallel tracks)
50
- 22205 (112.6+4*50=312.6)
54.2
- 22204 (balance for turnout R1 24°; R5 15°)
55.5
57.5
104.2
111
222
312.6
- 22202 (312.6=3*104.2)
730
777
- 9106 (flex)
corbes
192
7.559055
R1
194.6 7.661417
R1
- 22221 30°
R1
225.6
8.881890
R2
228.2 8.984252
R2
R2
261.8
10.307087
R3
- 22223 30°
295.4
11.629921
R3a
329 12.952756
R4
- 22225 15°
R3
362.6
14.275591
R5
R4
396.4
15.606299
R3
430
16.929134
R4
480
18.897638
R6
- 22227 15°
492.6 19.393701
R5
526.2 20.716535
R6
765
30.118110
R7
- Combinacions / Combinations
- ...
- Comercial / Commercial
-
Palau
Rocafort
BLM
special
recta 312.6
22202
2,10
2,30
2,30
2,08
recta 104.2
22203
1,20
1,30
1,18
encarrilador
22210
1,90
1,99
2,40
2,17
desenganxador
22212
14,90
15,65
15,90
14,39
topall
22216
2,90
3,20
2,90
R3a 30° 22224
1,40
1,40
1,27
R5 15° 22226
1,40
1,27
doble desviament
22246
42,90
44,95
44,90
40,63
desviament
22261
23,40
25,55
24,90
22,53
desviament
22263
23,40
25,40
24,90
22,53
- ...
-
- Desviaments, altres / Turnouts, others
manual
motor
control
desenganxador / uncoupler
F 9114
F 9414 (pdf)
R 10775 (pdf)
F 9112
F 22212
desviament / turnout
F 942101 (pdf)
F 942201
F 22218 (pdf)
F 22219
- Programari / Software
llicència
SO
Linux
Android
MSWindows
MacOS
design
Rail3D
Raily
x
SCARM (3D)
commercial
(wine)
-
x
XTrackCAD
GPL 2.0
x
control
iTrain
x
JMRI
GPL 2.0
Java
Java Java OpenDCC
Rocrail Rocrail.net
x (RPi) x
x
x
- FPM
group
project
description
content francesc.pinyol.m
fritzing-modeltrain additional elements for Fritzing, related to model trains
svg fzpz
breadboard icon pcb schematic
connectors - Phoenix_MPT-1_2_54mm_pitch_breadboard.svg
- Phoenix_MPT-3_2_54mm_pitch_breadboard.svg
- Phoenix_PT-1_3_50mm_pitch_breadboard.svg
- Phoenix_PT-2_3_50mm_pitch_breadboard.svg
- jumper_2_100mil_pcb.svg
- jumper_2_3.5mm_pcb.svg
- jumper_3_100mil_pcb.svg
- connector_2_schematic.svg
- connector_3_schematic.svg
dcc - digikeijs_breadboard.svg
- digikeijs_dr4018_breadboard.svg
- roco_z21_breadboard.svg
- digikeijs_dr4018_pcb.svg
- roco_z21_pcb.svg
- roco_z21_schematic.svg
- roco_z21.fzpz
signals - signal_4l_breadboard.svg
- signal_4l_schematic.svg
tracks - track_n_straight_breadboard.svg
- track_n_turnout_breadboard.svg
- solenoid_double_schematic.svg
- track_n_straight.fzpz
- track_n_turnout_left.fzpz
components - 6n137_breadboard.svg
- 6n137_icon.svg
- 6n137_pcb.svg
- 6n137_scehmatic.svg
- 6N137.fzpz
jmri-signals automatic creation of JMRI additional signals
jmri-tutorial files related to JMRI tutorial
xtrkcad-custom-fpm Custom parts for XTrackCAD - proto-fpm.xtp
- structures-fpm.xtp
- basics.xtc
- stations.xtc
dcc-fpm
decoder
sketches based on NmraDcc library - AccessoryDecoder_1
- AccessoryDecoder_1.ino
nmradcc-fpm
sketches based on NmraDcc library
- NmraDcc_Monitor
- NmraDcc_Monitor.ino
- NmraDccAccessoryDecoder_2_fpm
(usage of notifyDccSigOutputState)
- README: CV definition
- Mast.cpp
- Mast.h
- NmraDccAccessoryDecoder_2_fpm.ino
- accessory_decoder_fpm.xml (for JMRI signalling)
apdcclibrary-fpm sketches based on AP_DCC_Library
fpm-trens
-
z21-fpm z21-python software in Python related to Z21 central station
- Modellbahnsoftware
- XTrackCAD
- SCARM
- Comercial a partir de la versió 1.0.0 / Commercial
from version 1.0.0
- La versió de prova pot desar un circuit de fins a 100 vies / Trial version for up to 100 tracks
- Si teniu un circuit fet amb les versions 0.9.x el podreu obrir amb la versió 1.0.0, però no el podreu desar. Si ho voleu fer, haureu de pagar el rescat.
- Format specification (BTTB-TT.lib)
Program Files/SCARM/Lib/Roco-N.lib: Fleischmann-N -> N-scale track system (Rebranded Roco-N)
- Baseboard/Workbench Support Structure For Your SCARM Layout
- i18n
~/.wine/drive_c/users/Public/Application
                              Data/SCARM/langdata.custom
- Wine
- Running SCARM on Apple Mac
- WineHQ: SCARM
- Instal·lació / Installation
wine SCARMsetup_1_0_0e.exe
- Utilització / Usage
wine "c://Program Files
                                  (x86)/SCARM/scarm.exe"
- Problemes / Problems
- 3D:
Access violation at address
                                  00000000, Read of address 00000000
- Solució / Solution
- ...
- 3D:
- Comercial a partir de la versió 1.0.0 / Commercial
from version 1.0.0
- OpenDCC
- Rocrail
- FPM
- Electrònica / Electronics
- Jerarquia / Hierarchy
-
info
DCC Central (integrated booster)
Booster #1
power district (wp)
district #0
district #1
cantó / railway block (qum) - only one locomotive
- allowed to stop
- at least one sensor
- no turnouts
- start: block signal
- end: signal
block #0.1
block #0.2
block #1.1
block #1.2
rocrail blocks and routes
RR route to block #1
RR block #1
RR route to block
RR staging block #2
RR route to block #3
RR block #3
RR route to block #4 RR block #4 section (for staging blocks)
section #2.1
section #2.2
sensors
1 sensor
regular
sectionsensor
sectionregular
section2 sensors
regular
sectionsensor
sectionregular
sectionsensor
sectionregular
section3 sensors
regular
section
sensor
section
regular
section
sensor
section
regular
section
sensor
section
regular
section
4 sensors
5 sensors
-
-
brand
command station
system
DCC
Motorola
mfx
OpenDCC
x
Fleischmann / Roco
Multimaus
79
z21 (white)
159 Z21 (black)
x
x
-
376
Märklin / Minitrix
Central Station 2
Mobile Station
60653
x
x
x
126
- General
- IbertrenDuino
- Wiring for DCC
- DCC
for begginers
- General
- Turnouts
- Locomotives
- Track Wiring
- Booster network wiring
- Wiring turnouts
- ...
- Soldering tips
- DCC
for begginers
- Circuits electrònics / Electronic circuits
- Voltatges / Voltages
-
generació
Fleischmann 681301 (from z21 set) (36VA)
dc 2A
Fleischmann 670601 (40VA) (replaces Fleischmann 6706, Roco 10725)
(distributed with 10726)
(74,90) (82,40) (82,95) (79,90)
ac 2.85A
(clips)
ac 2.5A
(cable)
Lenz TR100 26000 (45VA) (69,00) (59,95)
ac
Lenz TR150 26150 (70VA) (89,90)
ac
Roco 10723
ac 0.4A
Roco 10725 (replaced by Fleischmann 670601)
ac
Roco 10850 (for z21 start; Z21 CAN HUB) (36W)
dc 2A
Roco 10851 (for z21, Z21; z21 single booster) (54W) (80,90) (74,90)
dc 2.6A
Roco 10857 (for z21 Dual Booster) (120W)
dc 6A
Viessmann 5200 (52VA) (68,90)
ac
ac
Viessmann 5201 (150VA) (179,90)
ac
ac
Digikeijs DR60710 (3.75-4.5A) (included in DR5033) (32,90)
dc 4.5A
dc
dc
dc
dc
dc 3.75A
dc
XpressNet
dc
power supply for DCC HO (Locoduino)
dc dc dc
power suppy for DCC N (Locoduino)
dc dc dc dc
PC power supply dc
dc
Switched power supply (RS) dc
dc
dc
dc
z21 track_output = input - 1V
DCC ... ... ... ... ... ...
Z21 configurable track output; max_track_output = input - 1V
DCC ... ... ... ...
Z21 Light Booster 10805 (output = input - 1.1V)
DCC DCC DCC DCC DCC DCC DCC DCC DCC DCC DCC DCC DCC
Digikeijs DR4018 (OUT) (DC; common anode / positive)
dc dc dc dc dc dc dc
DIY DCC accessory decoders output (Arduino based) dc
v
5
6
7
8
9
10
11
12
13
14
15
16
17
18
19
20
21
22
23
24
consum DCC decoders
ac (685303)
z21 (DC Power) (track_output = input - 1V)
dc
(681301, 10850)
dc dc (10851) dc dc dc dc Z21 (DC Power) (configurable track output; max_track_output = input - 1V)
dc dc dc (10851) dc dc dc dc Arduino Uno, Mega (USB) dc
Arduino Uno, Mega (DC jack, Vin)
dc dc dc dc dc dc
Arduino Nano Every (VIN)
dc dc dc dc dc dc dc dc dc dc dc dc dc dc dc
Arduino motor shield (Vin)
dc dc dc dc dc dc dc dc dc dc dc dc
DIY DCC accessory decoders
DIY throttles
Semàfors / Light signals (LED) (Mafen)
dc
dc dc dc dc dc dc
Desviaments / Turnouts
ac/dc
ac/dc
ac/dc
Digikeijs DR4018 (Power)
ac/dc ac/dc ac/dc ac/dc ac/dc ac/dc ac/dc
Digikeijs DR5033 booster (Power) (includes ...)
dc dc dc dc dc dc
Z21 Light Booster 10805 (output = input - 1.1V)
dc dc dc dc dc dc dc (10850) dc dc (10851) dc dc dc dc Z21 Single Booster 10806
dc dc dc (10851) dc dc dc dc Z21 Dual Booster 10807
dc dc dc (10857) dc dc dc dc - Zaratren: transformadores
- Notes:
-
- Cables / Wires
- Codi de cable compost
-
norma
- H: norma europea
tensió
- 01: 100/100V
- 02:
- 03:
- 04:
- 05: 300/500V
- 06:
- 07: 450/750V
aïllament
- V: PVC
- Z1: lliure d'halogens
coberta
forma
- F: flexible
nombre de cables
- 2, 3, ...
terra
- G: amb terra
- X: sense terra
secció
- (mm²)
-
-
diàmetre exterior
diàmetre
secció
Brawa
3153
0,10mm
0,14mm²
Busch
5790
0,25mm
0,05mm²
2
0,50mm
0,75mm
cable unipolar
1,4mm
0,2mm²
9,50
-
8 colors: groc, blau, blanc, gris, negre, taronja, vermell, verd; 10 colors: + marró, violatNorma americana
AWGNorma europea
número
R
secció
secció
diàmetre
màx
màx
pcb connector ús
comercial
(Ohm/m) (mm²) (mm²) (mm) W
A
ús domèstic
(REBT)ús
DCCmodelisme
Leroy
Merlin
Diotronic
OndaRadio
10,00
3,57
7360W
alt consum
- x
10
6,00
2,76
5750W
25-32A
cuines, forns
- x
12
4,00
2,26
4600W
20-25A
rentaplats, rentadores
- bus (>40ft) (dccwiki)
- x
13
0,0065
2,63
14
0,0082
2,08
2,50
1,78
3680W
16-20A
endolls
- bus (21-40ft) (dccwiki)
- x
- Q1170x (groc, negre, vermell, verd)
15
0,010
1,65
16
0,013
1,31
1,50
1,38
2300W
10A
Phoenix MKDS 3.5, 3.81 il·luminació
- bus (1-20ft) (dccwiki)
- x
18
0,021
0,82
1,00
1,13
- feeder (<10ft) (dccwiki)
- Q1150x (groc, blau, negre, vermell,verd/groc)
19
0,75
petits electrodomèstics
- blau, marró, groc/verd
20
0,033
0,52
0,50
0,80
Phoenix MPT 2.54
- feeder (<10ft) (dccwiki)
0,44
0,75
22
0,053
0,32
- feeder (<5ft) (dccwiki)
0,25
- senyals (qum)
0,22
0,53
- Q1130x (blanc, gris, marró, negre, vermell, verd, groc, blau)
24
0,084
0,20
0,20
0,50
26
0,134
0,13
0,14
0,42
- Brawa 3153
- Busch 179x
- CT9101x (groc, blanc, marró, negre, taronja, vermell, verd, blau)
0,07
28
0,213
0,08
0,05
0,25
- Codi de colors i seccions (escala N) / Colour code and
sections (N gauge)
-
Wiring for DCC B.A.-BA
HO-ptit-train
Digikeijs
Fleischmann
Quiero una maqueta
N-Trak DCCWiki /
Digitrax
FPM
secció color secció
color
secció (mm²)
color
secció
Paneles de control
Manual secció
color
secció
color
Bus principal / Main bus
- un bus principal per booster / one main bus per booster
AWG10 (twisted)
1,5-2,5
1,5
blau / gris negre / vermell negre / vermell
negre / vermell
1,5
blau / negre, gris (feedback) Bus de cantó / Local bus
- un bus local per cantó / one local bus per block
- segueix el traçat de les vies
- connectat al bus principal mitjançant un disjuntor o bombeta (+interruptor opcional) / connected to main bus through a circuit breaker
- connectat al bus principal amb t-taps / connected to main bus using t-taps
- detector de corrent associat / associated current detector
AWG14 (untwisted)
blau / negre
blau / marró, gris (feedback) Bus-rail / Feeder (dccwiki)
- connectat al bus local amb t-taps / connected to local bus using t-taps
- soldat a la via / soldered to track
AWG24-22 (solid)
AWG22
blau / blanc
groc / blau
0,75
Il·luminació
AWG26
blanc / blanc
Motors
taronja / gris
taronja / gris
Desviament / Switch
blau / negre / vermell marró / negre / marró verd / negre / vermell
groc / blau / blanc /
Desviament lent / Slow switch
groc / blanc
Semàfor / Signal
verd / groc / vermell / negre
AC
vermell / blanc
violat / marró
- Codi de colors (electrònica) / Electronic color code
- Paneles
de control (Quiero una maqueta)
- 0,25, 0,75
- Le câblage 1° partie : les règles de base (HO-ptit-train)
- Wiring color code (Digitrax) (DCC wiki)
- Manual (pdf) (N-Trak)
- Domèstic (REBT)
- neutre: blau
- fase: negre, marró, gris
- terra: groc/verd
-
- Wiring (DCC wiki)
- Codi de cable compost
- Connectors
- Paneles de control (Quiero una maqueta)
- Power Connectors for Garden Railroad Applications
- T-Taps
- entre bus i feeders
- Farnell
- Regletes
- Onda Radio
- Regletes
- Regletas de conexión (negres)
- Regletes
- Onda Radio
- JST
-
pitch
circuits
male
female
Diotronic
Onda Radio
Farnell
aeri
header (pcb)
contact
housing
contact
JST
wire to board
XH
3
-
B3B-XH
-
XHP-3
SXH-002T-P0.6
- B3BXHA (m) (pcb)
- XHP3 (f)
- BTWF3 (f) (cable)
- BHF001T08SS (SMP) (t)
- BPH002TP05S (PHR2) (t)
- BTWF3SC (f)
XH (f)(mc)(m)(t)
2.54 3
- BTWM3 (m) (pcb)
3
- BTWMH3 (m) (pcb)
EH
3
- BTWS1X3 (joc 25)
EH
NH
2.50
3
- H3PSHFAA (f)
- BPH002TP05S (PHR2) (t)
NH (f) (m) (mc)
EL
EL
HL
HL
JQ
JQ
NV
NV
RA
RA (f)
VH
VH
Wire to wire
SM
2.54
3
SMR-03V
...
SMP-03V-NC
...
- SMR03VB (m)
- SMP03VBC (f)
SM
4
SMR-04
SMP-04
- SMPR04B (m+f+con)
4.50
3
- BE6803 (blister)
6.2
3
6.3
3
- BL603 (blister)
-
- Busos des de l'estació de control / Buses from command station
- DCC
(wp)
- Resum / Summary
- Info
- Maquinari obert / Open hardware
- Estació de control / Command station
- Descodificador / Decoder
- Bucle / Loop
- Comercial / Commercial
- Jerarquia / Hierarchy
Rocrail
- Developer
corner
- Install Rocrail server to Raspberry
Pi
- Rocrail
Nightly Builds
- Server and Rocview
sudo apt-get -f install
sudo apt-get install libwxgtk3.0-devwget http://rocrail.net/software/rocrail-snapshot/rserver/rocrail-server-xxxx-raspbian-armhf.debsudo dpkg -i rocrail-server-xxxx-raspbian-armhf.deb- to start now
sudo systemctl
                                      start rocraild.service
(sudo /etc/init.d/rocraild start)
- to start at every boot
sudo systemctl enable
                                      rocraild.service
(sudo update-rc.d rocraild enable)
- Server and Rocview
- Rocrail
Nightly Builds
- Build
Rocrail from source
git clone https://github.com/rocrail/Rocrail.git- Source access at GitLab.com
- git clone ...
- dependències / dependencies
- Mageia
urpmi libusb1.0-devel
                                  [lib64usb1.0-devel] lib64wxgtku3.0-devel
                                  gcc-c++
cd /usr/include; ln -s wx-3.0 wx
- Raspbian (Raspberry Pi)
- Mageia
cd Rocrailmake allsu; make install- will be installed in /opt/rocrail
- Install Rocrail server to Raspberry
Pi
- Ús / Usage
-
server
client
without workspace
(can be in a different computer, e.g. a RPi)
with workspace
(same computer as client)
usage
- default workspace: no need specifically start a server; simple usage
- non-default workspace:
- test downloaded plans
- modular layout
config files
default
- /opt/rocrail/plan.xml
- /opt/rocrail/rocrail.ini
- ~/rocrail/
- created by rocview.sh:
plan.xml(track plan)
- created by rocview, when closing:
rocrail.iniocc.xml(block occupancy)
- created by rocview.sh:
- ~/rocrail/
- created by rocview.sh:
svg/images/decspecs/stylesheets/
- created by rocview, when closing:
- created by rocview.sh:
non-default
- ~/my_workspace/
plan.xmlrocrail.ini
my_rocview.ini
start
- default workspace (~/rocrail)
- /opt/rocrail/rocview.sh
- first time, it will create:
cp
                                              /opt/rocrail/default/plan.xml
                                              ~/rocrail
ln -s /opt/rocrail/svg ~/rocrail/svgcp -pur /opt/rocrail/images ~/rocrailcp -pur /opt/rocrail/decspecs ~/rocrailcp -pur /opt/rocrail/stylesheets ~/rocrail
- it will launch
cd ~/rocrail/opt/rocrail/rocview -sp /opt/rocrail $*
- File / Open Workspace...
- ~/rocrail
- if next times you launch rocview.sh
you do not want to "Open workspace...",
you can select autoload:
- File / Rocview Properties /
General
- Default Workspace: ~/rocrail
- Use Workspace at startup: checked
- File / Rocview Properties /
General
- first time, it will create:
- /opt/rocrail/rocview.sh
- non-default workspace (~/my_workspace)
- first time
- check that rocview does not load a
workspace at start:
- /opt/rocrail/rocview.sh
- File / Rocview Properties /
General
- Use Workspace at startup: unchecked
- File / Rocview Properties /
General
- /opt/rocrail/rocview.sh
- Create
a new workspace
cdmkdir my_workspacecd my_workspace- optionally, if you want a
non-empty plan:
cp/opt/rocrail/default/plan.xml .
- relaunch rocview and load the
workspace
- /opt/rocrail/rocview.sh
- File / Open Workspace...
- ~/my_workspace
- if they do not exist, rocview
will create, when closing:
- ~/my_workspace
rocrail.iniocc.xml
- ~/my_workspace
- if next times you launch
rocview.sh you do not want to
"Open workspace...", you can
select autoload:
- File / Rocview Properties
/ General
- Default Workspace: ~/my_workspace
- Use Workspace at startup: checked
- File / Rocview Properties
/ General
- File / Open Workspace...
- /opt/rocrail/rocview.sh
- check that rocview does not load a
workspace at start:
- first time
sudo systemctl start rocraild.servicesudo systemctl enable rocraild.service
- primera vegada / first time:
mkdir rocview_with_rpi_servercd rocview_with_rpi_serverln -s /opt/rocrail/svg .cp -pur /opt/rocrail/images .cp -pur /opt/rocrail/decspecs .cp -pur /opt/rocrail/stylesheets .
/opt/rocrail/rocview
                                      -h raspberrypi.local
- it will use plan.xml in raspberrypi server (/opt/rocrail/plan.xml), but svg dir is needed in order to render it
- when closing, it will create a default rocview.ini, with
<rrcon
                                            host="raspberrypi.local" port="8051"
                                            retry="1"/>
- següents vegades / next times:
cd rocview_with_rpi_server/opt/rocrail/rocview [-s xx]- -s: especifica quina pestanya de l'esquema s'obre quan arrenca / specifies plan tab to be open at start
- alternative ini file:
- /opt/rocrail/rocview -h raspberrypi.local [-s xx] -i my_rocview.ini
- Mode de funcionament amb workspace (crea, si cal,
els directoris amb la configuració, engega el servidor local
i el client):
$ /opt/rocrail/rocview.sh- Si encara no existeix, crearà el directori
~/rocrail, amb:
/If it does not exist, it will create the directory ~/rocrail, with:- una còpia de:
/opt/rocrail/default/plan.xml(ln) /opt/rocrail/svg//opt/rocrail/images//opt/rocrail/decspecs//opt/rocrail/stylesheets/
- i un fitxer rocview.ini:
<?xml
                                      version="1.0" encoding="UTF-8"?>

                                      <gui locowidgetstab="false">

                                        <trace/>

                                        <locogrid>

                                          <colpos id="0"
                                      pos="0" show="true"/>

                                          <colpos id="1"
                                      pos="1" show="true"/>

                                          <colpos id="2"
                                      pos="2" show="true"/>

                                          <colpos id="3"
                                      pos="3" show="true"/>

                                          <colpos id="4"
                                      pos="4" show="true"/>

                                          <colpos id="5"
                                      pos="5" show="true"/>

                                          <colpos id="6"
                                      pos="6" show="true"/>

                                          <colpos id="7"
                                      pos="7" show="true"/>

                                          <colpos id="8"
                                      pos="8" show="true"/>

                                          <colpos id="9"
                                      pos="9" show="true"/>

                                          <colpos id="10"
                                      pos="10" show="true"/>

                                          <colpos id="11"
                                      pos="11" show="true"/>

                                        </locogrid>

                                        <window x="50" y="50" cx="900"
                                      cy="600"/>

                                        <rrcon host="localhost"
                                      port="8051"/>

                                        <planpanel locobook="true"
                                      planbook="true" tracewindow="true"
                                      scale="1.000000" showid="false"
                                      showcounters="false" raster="false"
                                      tooltip="true" showlocked="false"
                                      showpending="true"/>

                                        <splitpanel main="455" msg="400"
                                      plan="360"/>

                                      </gui>
- una còpia de:
- Open Workspace
- ~/rocrail
- Switch power on
- Switch auto mode on
- Connection to a remote server (e.g. Raspberry Pi)
- Connect to:
- <your_rpi_ip_address>
- Port: 8051
- Connect to:
- Si encara no existeix, crearà el directori
~/rocrail, amb:
-
- Documentation
- Step-by-Step
Tutorial
- 3.0
Adding a Command Station
- File -> Rocrail Properties -> Controller
- z21
- Problemas
z21 y rocrail. RESUELTO
- Address / Port
- Rocrail properties
- Version: 1
- Decoder steps: 28
- Problemas
z21 y rocrail. RESUELTO
- 3.0
Adding a Command Station
- Rocview (GUI client)
- Multiple Rocviews (complex layouts)
- Rocview workspaces
- Modular
layout setup
- create modules
- Go offline
- Track plan / Add track panel
- Track plan / Edit panel
- Save
- module_1.xml
- create a module plan
- create
an empty workspace
- ~/my_workspace_modular
- modify name and type of plan:
- Rocrail properties
- Track plan file: modules.xml
- Module plan: selected
- Rocrail properties
- create
an empty workspace
- and add modules to it:
- restart rocview
- Open Workspace: ~/my_workspace_modular
- Add module: module_1.xml
- create modules
- Forum
- Automatic
modes
-
mode
operador de trànsit / train dispatcher
maquinista / railroad engineer
desviaments, senyals / switches, signals
locomotive
manual
user
user
half-automatic
rocrail (blocks, sensors, routes)
user
automatic
rocrail - Jerarquia / Hierarchy
- Blocks
- Sensors
and blocks
- Sensors
- Staging
blocks (station)
- Blocks
- Sections
- Blocks
-
block
rocrail route
rocrail block
event:
enter2route
enter
shortin
pre2in in
exit
train enters the route
train enters the block
short train reaches a point before
the end (e.g. station building)if train has to stop,
it reduces the speed
train reaches the end of the block
simulated (generated after event timer)
(enter2shortin)
(enter2pre) (enter2in)
sensor type
occupancy
impulse
if the train has to stop, V=
Vmid Vmid
0
Vmin 0
other usage
stop point for short trains
1 sensor
enter2in
enter2route
2 sensors
enter2pre in
3 sensors
enter2shortin
pre2in in
enter
shortin
in
4 sensors
enter shortin pre2in in
5 sensors
- Routes
- Signals
- Senyalització / Signals
- Signal setup
- Dutch signal (3 lights)
- Programming -> RocPro -> DR4018
- Presets
- Nr: 47
- Value: 7 (4x dutch signal)
- This will give 16 addresses
- Presets
- Control with a three-light icon
- ...?
- Control with 4 output buttons
- Track plan -> Add item -> Accessory
-> Output
- General
- ID@: O1
- Type: toggle switch
- Interface
- Address:
- 1 (to control a red LED connected to OUT1 / 1)
- Options:
- switch: enable
- invert: enable
- Address:
- General
- Track plan -> Add item -> Accessory
-> Output
- General
- ID@: O2
- Type: toggle switch
- Interface
- Address:
- 2 (to control a yellow LED connected to OUT1 / 2)
- Options:
- switch: enable
- invert: enable
- Address:
- General
- Track plan -> Add item -> Accessory
-> Output
- General
- ID@: O3
- Type: toggle switch
- Interface
- Address:
- 3 (to control a green LED connected to OUT2 / 1)
- Options:
- switch: enable
- invert: enable
- Address:
- General
- Track plan -> Add item -> Accessory
-> Output
- General
- ID@: O4
- Type: toggle switch
- Interface
- Address:
- 4 (to control a white LED - digit board connected to OUT2 / 2)
- Options:
- switch: enable
- invert: enable
- Address:
- General
- Usage (pdf):
O1 O2
O3
O4
NS 3 lights with digit board
R
R
R
night dim
0
Red
G
R
R
1
Green
R
G
R
2
Yellow
G
G
R
3
Flashing green with digit
R
R
G
4
Yellow with digit
G
R
G
5
Flashing green
R
G
G
6
Flashing yellow
G
G
G
7
Yellow with flashing digit
- Track plan -> Add item -> Accessory
-> Output
- Programming -> RocPro -> DR4018
-
- Outputs
- Control de llums simples (z21 + Digikeijs DR4018) /
Simple light control (z21 + Digikeijs DR4018)
- Programming -> RocPro -> DR4018
- Presets
- Nr: 47
- Value: 1 (16x permanent on/off switch)
- This will give 16 addresses
- Presets
- Track plan -> Add item -> Accessory ->
Output
- General
- Type: toggle switch
- Interface
- Address:
- 1 (to control a LED connected to OUT1 / 1)
- 2 (to control a LED connected to OUT1 / 2)
- 3 (to control a LED connected to OUT2 / 3)
- ...
- Port: (not used by z21)
- Options:
- switch: enable
- invert: enable
- Address:
- General
- Programming -> RocPro -> DR4018
- Control de llums simples (z21 + Digikeijs DR4018) /
Simple light control (z21 + Digikeijs DR4018)
- Adreces / Addressing
- RocPro
(activation key is needed)
- cvbyte
- z21
- Mode: direct
- ...
- Step-by-Step
Tutorial
- Supported
command stations
- z21
- Roco 10787 programming
- Roco Rocomotion
- z21
- Hardware
family
overview interface
bus
CGA Modules
Movement / Power switching:
- GCA76: 8 port output driver for turnout coils > 0,5A
- GCA77: 8 port output driver for turnout coils <0,5A
- GCA102: Reverse loop circuit
- GCA107: Multi purpose Relay board
- GCA136: 4 servo interface with feed-back
- GCA145: Turntable / Fiddle yard controller
- GCA178:
LED signalling:
- GCA86
- ...
Boosters
RFID readers:
- ID-12
- ID-20
servo motors
LNet png
- RS232
- USB
- Ethernet
LocoBuffer
LocoNet
LocoIO
- GCA123
- GCA124
- GCA141
LocoIO
x
CAN-GCA
(MERG CBUS)
png
- CAN-GC1
- CAN-GC1e (ethernet)
CAN-bus
x
x
x
RocNetNode
(Raspberry Pi with Raspbian package)
png, pdf
jpg
GPIO
GCA-PI01: RPi HAT / GCA-PI06 5V 3A Power Supply I2C
x (10-pin PSK)
x
RS232
DCC232 (DCC generator)
x
SPROG USB dongle
SPROG (DCC generator)
x
DDX
x
RFID12 (RFID reader)
x
- ...
Lèxic
| ca |
en |
es |
fr |
|
|---|---|---|---|---|
| límite de cantón |
jalon
de canton |
|||
| piquet d'entrevies |
piquete de entrevías |
limite de garage franc |
||
| via morta |
voie d'impasse |
|||
| voie de dépassement |
||||
| terraplén |
remblai |
|||
| desmonte |
déblai |
|||
| shunt |
||||
| xebró |
cabrio |
chevron |
||
| éclisse |
||||
| mojón |
||||
| eines |
||||
| recte | closed | |||
| desviat | thrown |
- Vagons / Wagons
Classification UIC ca en es fr K: Plats à essieux indépendants
R: Plats à bogiesplataforma flat plataforma plat L: Plats spéciaux à essieux indépendants
S: Plats spéciaux a bogiescangur pocket canguro poche, kangourou
stake teleros ranchers amovibles E: Tombereaux obert gondola (USA), open (EU) abierto tombereau
slide tarpaulin lonas corredizas bâche coulissante G: Couverts cobert
box cubierto
couvert
H: Couverts spéciaux
sliding wall paredes correderas parois coulissantes T: Toit ouvrant
opening roof
toit ouvrant
furgó caboose (USA), brake van (UK) furgón
I: Isothermes, réfrigérants ou frigorifiques frigorífic
reefer, refrigerator
UIC-I, isothermes
ramader
stock jaula
bétailler
F: Tombereaux spéciaux tremuja hopper tolva trémie
balast balast
U: Spéciaux sitja silo silo silo
grua crane grúa grue Z: Citernes cisterna
tank cisterna
citerne
Cotxes
- Scalextric (1:32)
http://www.francescpinyol.cat/modelisme.html
Primera versió / First version: 9.V.2015
Darrera modificació: 19 d'octubre de 2025 / Last update: 19th
October 2025